At the request of some friends, I thought I would post some basic advent calendar making steps. This is not a good, detailed tutorial as I kept forgetting to take pictures! Feel free to email me if you have any questions. Okay, here it goes. This is roughly based off of the pottery barn kids advent calendar seen here http://www.potterybarnkids.com/products/telluride-advent-calendar/?pkey=x|4|1||3|advent%20calendar||0&cm_src=SCH.
In the tree above:Step 1:
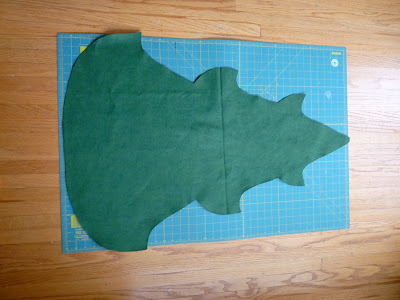
Cut 2 trees out of green
wool felt. We did 2 different color green calendars. One dark and one light. Both had pros and cons so just got with your personal preference. Our tree measured about 25" wide and 36.5" tall. (The pottery barn one was much bigger than this, we were just trying to save on cost of fabric). You'll also need 1 tree in interfacing. I used
deco bond.
Step 2:
Iron the deco bond onto the back of the tree you are using as the front of your calendar.
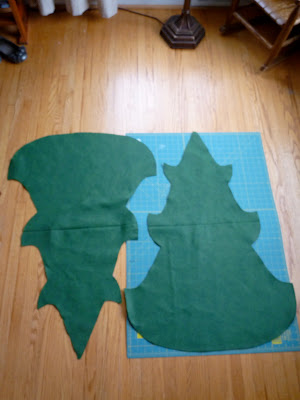
If you cut the trees like this, you only need 42" of fabric for 2 trees (1 calendar).
(Sorry for the turned picture, my computer wasn't cooperating---imagine this with no trunk please).
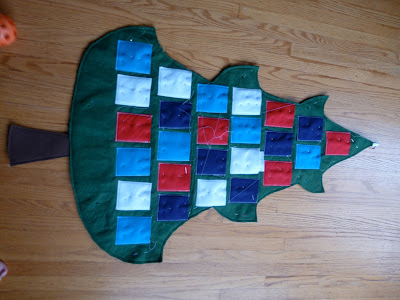
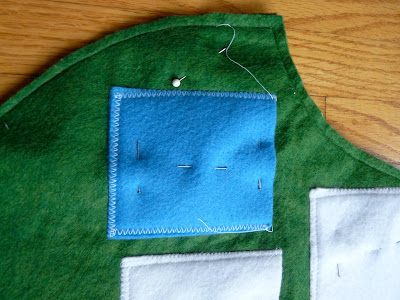
Step 3:
Choose pocket colors. We went with 4 different colors. These pockets are doubled normal felt that you can buy by the yard. Our pockets measure 3.5x3. So, if you are cutting 4 colors of pockets you need about 18x7 of felt for 3 colors, and 21x7 for 1 color.
Step 4:
Before cutting your pockets, iron
wonder under (you can get this where interfacing is sold) onto 1/2 of the felt. So--for purple for example, iron on 18x3.5 inches of wonder under to one side of felt. Peel paper off, fold over other half of felt. Place a damp cloth or spray steam on felt, iron on top of felt to fuse the 2 pieces of felt together. This makes the felt stiffer/thicker. We found wonder under worked better than spray adhesive.
Step 5:
Cut pockets into 3x3.5 inch rectangles. Double check to make sure 2 pieces are completely fused after you cut. If not, re-iron to completely seal. You should now have 6 pockets of 3 colors, and 7 pockets of 1 color.
Step 6:
Arrange pockets on the tree in the sequence you prefer. Pin. I would definitely make sure it's secure...3/4 pins if you can as 2 made the pockets slide.
Step 7:
Sew the pockets onto the tree. I used clear thread. I'd never used that before and it was definitely a pain. The thread kept breaking. I finally switched to white thread for the last 2 calendars I did (that's what you see in the picture). Either way is fine, it's up to you. Again, totally personal preference. You can choose to do a straight stitch or zig zag.
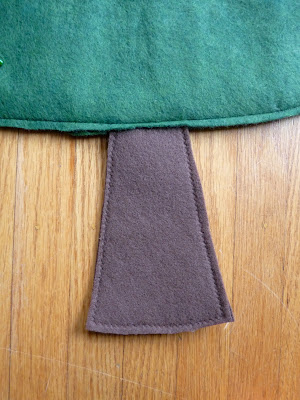
Step 8:
Sew 2 trees together. I did use clear thread for this and it was fine. I think the clear thread just has issues when you stop and go on the pockets. I left about a 1/4 inch seam all the way around. Don't forget to slip in your trunk. (Oh yeah, sew your trunks together. I used deco bond/interfacing on this as well for support...mine is about 7 inches tall, 3-4 inches wide at the bottom)
Step 9:
As you are sewing, make sure you slip in a ribbon and hook at the top. You don't need to leave much ribbon as the star isn't that big.

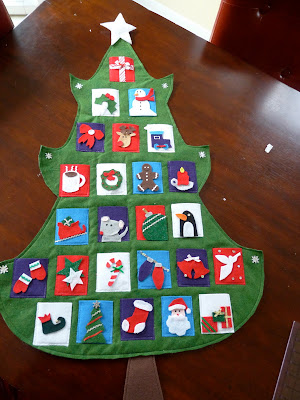
Step 10: Decorate!
Star: I interfaced this as well and then just hot glued it on the top.
Pocket pieces: My friend Betty, made the images in pdf form so if you want them, just let me know. We all contributed in cutting out the images to save on individual work. The images were very basic and made out of felt. After hot gluing them on, I accented them with ribbon, sequins, ric rac, puff paint, bells, etc.
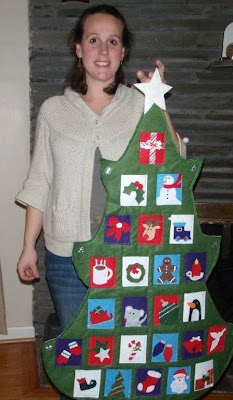
Ta Da! Finished calendar! :)